AWP - The Awesome Weekend Project
17 May 2025
Table of Contents
- Introduction
- MVP
- The learning resources
- Preliminary steps
- The code
- A quick peek at the web UI
- License
- The future
Introduction
One of those things that make Red Hat a special place are the so called “Learning days”, working days where you can primarily focus on improving your skills on subjects that then can have an impact on your team or organization and at the same time get you up to speed with newer technologies and trends. A few months back during one of these days I started getting my hands dirty with Rust. In the past I’ve been writing code in Go, due to its predominance in the k8s/Openshift world, so this really wasn’t my first experience with statically typed programming languages but the increased adoption Rust is having in multiple organizations and Open Source communities (with GNOME being one of them), its memory safety guardrails and the potential it has to slowly replace C in the very long run has hyped me to think it was a good idea for me to spend some time learning more about its internals.
The best way for me to get more proficient with a specific programming language is to write code with it, that also means I had to find a project of some sort to work on. In the back of my brain I always wanted to build my own cloud infrastructure with ability to spawn multi-arch VMs, have them configured using cloud-init and finally have them be able to communicate with the internet in one way or another (NAT? VLAN trunks?). At the same time I wanted a nice web UI to show the state of the VMs, be able to schedule new ones and perform specific actions on them. This is what encouraged me at some point in the development process to also learn a bit of ReactJS in order to be able to make the web UI look fancier with dynamic state updates.
Before actually starting any coding, I started thinking on what lower level technologies I was going to be using. The answer was OVN/OVS for the networking stack and libvirt/qemu for the virtualization layer. While Rust ships with a libvirt library I couldn’t find one for OVN so I had to code my own using the XML-RPC interface OVN ships with.
While this started as a Red Hat Learning Day project, it slowly became something I started working on at late night and/or during weekends. This is the reason why I decided to call it the AWP or Awesome Weekend Project.
MVP
It was important for me to clearly define what the MVP (Minimal Viable Product) of this private cloud solution could potentially be. I drafted the following requirements and decided to release version 0.0.1 only when these were met:
- Ability to schedule a multi-arch VM using the API and the web UI
- Ability to select multiple different operating systems
- Ability for the system to boot using cloud-init and define a default password, also have a working networking stack
- Ability to connect to the internet with trunked vlans and provider networks
- Ability to configure a L2 network and have two VMs communicate at L2
- Ability for VMs using a flat network to receive an IP address via OVN’s DHCP feature
- Ability to display specs, status of a VM and other tenant components within the web UI
- Have a working agent that would run on each hypervisor, collect specific metrics and send them to the controller to be able to then apply specific scheduler logic based on those data points
- Have a basic scheduler in place
- Have a deployment mechanism that could help me speed up the coding to testing phase, ideally using Ansible
The learning resources
I’d also like to share the resources I’ve used to learn Rust, associated libraries and ReactJS/TailwindCSS:
- The Rust Book - https://doc.rust-lang.org/book
- Easy Rust - https://dhghomon.github.io/easy_rust/Chapter_1.html
- ReactJS Course - https://scrimba.com/learn-react-c0e
- TailwindCSS Course - https://scrimba.com/learn-tailwind-css-c010
The Rust libraries I’ve used the most:
- https://docs.rs/virt/latest/virt/
- https://github.com/rust-netlink/rtnetlink
- https://docs.rs/axum/latest/axum/
- https://docs.rs/tokio/latest/tokio/
- https://serde.rs/
- https://github.com/launchbadge/sqlx
and the VSCode extensions I’ve interacted with:
- https://marketplace.visualstudio.com/items?itemName=rust-lang.rust-analyzer
- https://marketplace.visualstudio.com/items?itemName=bradlc.vscode-tailwindcss
Preliminary steps
My cluster consists of three systems:
- Raspberry Pi 5 (aarch64), hostname: sweetrevenge
- Beelink EQR6 (AMD Ryzen 9 6900HX, 24G of RAM), hostname: flumina
- A virtual machine hosted on the Beelink that serves as the OVN and AWP controlplane, hostname: ovn-control-plane
Configuration on ovn-control-plane
[root@ovn-control-plane ~]# subscription-manager list
+-------------------------------------------+
    Installed Product Status
+-------------------------------------------+
Product Name: Red Hat Enterprise Linux Fast Datapath
Product ID:   329
Version:      9
Arch:         x86_64

Product Name: Red Hat Enterprise Linux for x86_64
Product ID:   479
Version:      9.5
Arch:         x86_64

dnf install openvswitch3.5 ovn24.09-host ovn24.09-vtep ovn24.09-central

systemctl enable --now openvswitch
systemctl enable --now ovn-controller

echo 'OVN_NORTHD_OPTS="--db-nb-addr=ovn-control-plane --db-nb-create-insecure-remote=yes --db-sb-addr=ovn-control-plane  --db-sb-create-insecure-remote=yes  --db-nb-cluster-local-addr=ovn-control-plane --db-sb-cluster-local-addr=ovn-control-plane --ovn-northd-nb-db=tcp:ovn-control-plane:6641 --ovn-northd-sb-db=tcp:ovn-control-plane:6642"' >> /etc/sysconfig/ovn
systemctl enable --now ovn-northd

ovs-vsctl set open . external-ids:ovn-remote=tcp:ovn-control-plane:6642
ovs-vsctl set open . external-ids:ovn-encap-type=geneve
ovs-vsctl set open . external-ids:ovn-encap-ip=192.168.1.15
ovs-vsctl set open . external-ids:ovn-bridge=br-int

ovs-vsctl show
ovn-sbctl show
Configuration on sweetrevenge
apt install ovn-central ovn-host

systemctl enable --now openvswitch-switch.service

ovs-vsctl set open . external-ids:ovn-remote=tcp:ovn-control-plane:6642
ovs-vsctl set open . external-ids:ovn-encap-ip=192.168.1.12
ovs-vsctl set open . external-ids:ovn-encap-type=geneve
ovs-vsctl set open . external-ids:ovn-bridge=br-int

ovs-vsctl show
ovn-sbctl show
Configuration on flumina
apt install ovn-central ovn-host

systemctl enable --now openvswitch-switch.service

ovs-vsctl set open . external-ids:ovn-remote=tcp:ovn-control-plane:6642
ovs-vsctl set open . external-ids:ovn-encap-ip=192.168.1.17
ovs-vsctl set open . external-ids:ovn-encap-type=geneve
ovs-vsctl set open . external-ids:ovn-bridge=br-int

ovs-vsctl show
ovn-sbctl show
Connectivity test
ovn-control-plane:
ovn-nbctl ls-add s0
ovn-nbctl lsp-add s0 port01
ovn-nbctl lsp-set-addresses port01 00:00:00:00:00:01
ovn-nbctl lsp-add s0 port02
ovn-nbctl lsp-set-addresses port02 00:00:00:00:00:02

ip link add name veth01 type veth peer name port01
ip netns add ns0
ip link set dev veth01 netns ns0
ip netns exec ns0 ip link set dev lo up
ip netns exec ns0 ip link set dev veth01 up
ip netns exec ns0 ip link set veth01 address 00:00:00:00:00:01
ip netns exec ns0 ip address add 10.0.0.1/24 dev veth01
ip link set dev port01 up
ovs-vsctl add-port br-int port01
ovs-vsctl set Interface port01 external_ids:iface-id=port01

firewall-cmd --permanent --zone=public --add-port=6642/tcp
firewall-cmd --permanent --zone=public --add-port=6081/udp
sweetrevenge:
The RPi also requires building the geneve kernel module when using Raspberry Pi OS as follows:
apt install bc bison flex libssl-dev make

git clone --branch rpi-6.6.y https://github.com/raspberrypi/linux.git

dpkg -l | grep raspi-firmware
ii  raspi-firmware                       1:1.20250305-1                   all          Raspberry Pi family GPU firmware and bootloaders

# Click on revision --> Browse files
https://github.com/raspberrypi/firmware/releases/tag/1.20250305

curl https://raw.githubusercontent.com/raspberrypi/firmware/f9ff9c8f22a148a555a2c090af9649ad84709dc4/extra/git_hash -o /root/git_hash

cd linux
git checkout $(cat /root/git_hash)

export ARCH=arm64
KERNEL=kernel_2712

make bcm2712_defconfig

sed -i 's/# CONFIG_GENEVE is not set/CONFIG_GENEVE=m/' .config

# Commit ID is taken from the matching kernel version as taken from uname -r
curl https://raw.githubusercontent.com/raspberrypi/firmware/f9ff9c8f22a148a555a2c090af9649ad84709dc4/extra/Module_2712.symvers -o Module.symvers

rm /lib/modules/$(uname -r)/build
ln -s /root/linux /lib/modules/$(uname -r)/build

make -j6 Image.gz modules dtbs

cp net/openvswitch/vport-geneve.ko /lib/modules/$(uname -r)/kernel/net/openvswitch/
cp drivers/net/geneve.ko /lib/modules/$(uname -r)/kernel/drivers/net/

depmod -a
modprobe geneve
update-initramfs -u

rm /lib/modules/$(uname -r)/build
ln -s /usr/src/linux-headers-$(uname -r) /lib/modules/$(uname -r)/build

# If something fails or the module cannot be loaded use:
# make mrproper
# this will clean up build generated objects

dkms status
modprobe geneve

ip link add name veth02 type veth peer name port02
ip netns add ns0
ip link set dev veth02 netns ns0
ip netns exec ns0 ip link set dev lo up
ip netns exec ns0 ip link set dev veth02 up
ip netns exec ns0 ip link set veth02 address 00:00:00:00:00:02
ip netns exec ns0 ip address add 10.0.0.2/24 dev veth02
ip link set dev port02 up
ovs-vsctl add-port br-int port02 external_ids:iface-id=port02
ovs-vsctl set Interface port02 external_ids:iface-id=port02
Libvirt
On every hypervisor run:
dnf install qemu-kvm libvirt-daemon qemu-img virsh libvirt-devel xorriso -y
On RPis:
apt install qemu-system-arm qemu-efi-aarch64 libvirt-daemon-system xorriso libvirt-dev libvirt-clients -y
Once the packages have been installed, make sure /var/lib/libvirt/images/RHEL9-base.qcow2 and generally any other OS image via $OS-base.qcow2 points to a Cloud image, this is a specific image built for cloud platforms and comes with cloud-init out of the box, that means you won’t have to build your own via Image Builder and composer-cli, which is also unfortunately limited to be able to only compose images for the same RHEL/CentOS release the system is running on (i.e you cannot build a RHEL 10 image on RHEL 9).
Rust
# For the aarch64 binary use:
# https://static.rust-lang.org/rustup/dist/aarch64-unknown-linux-gnu/rustup-init
curl https://static.rust-lang.org/rustup/dist/x86_64-unknown-linux-gnu/rustup-init -o rustup-init
./rustup-init
From there you can rustup to manage your Rust installations and switch between them based on your needs.
The code
As I promised myself when I started developing this project, as soon as all the requirements I had in mind for the MVP were met, I’d have published the code on GitHub for general consumption and to potentially find more people interested in the idea and be willing to contribute to it further in case they found having a private cloud platform, that could serve the needs of an homelab and be 100% Open Source and based on Open Source technologies and at the same time being incredibly easy to setup, interesting.
The AWP project code can be found at https://github.com/averi/AWP, both the backend and frontend are stored within the same repository.
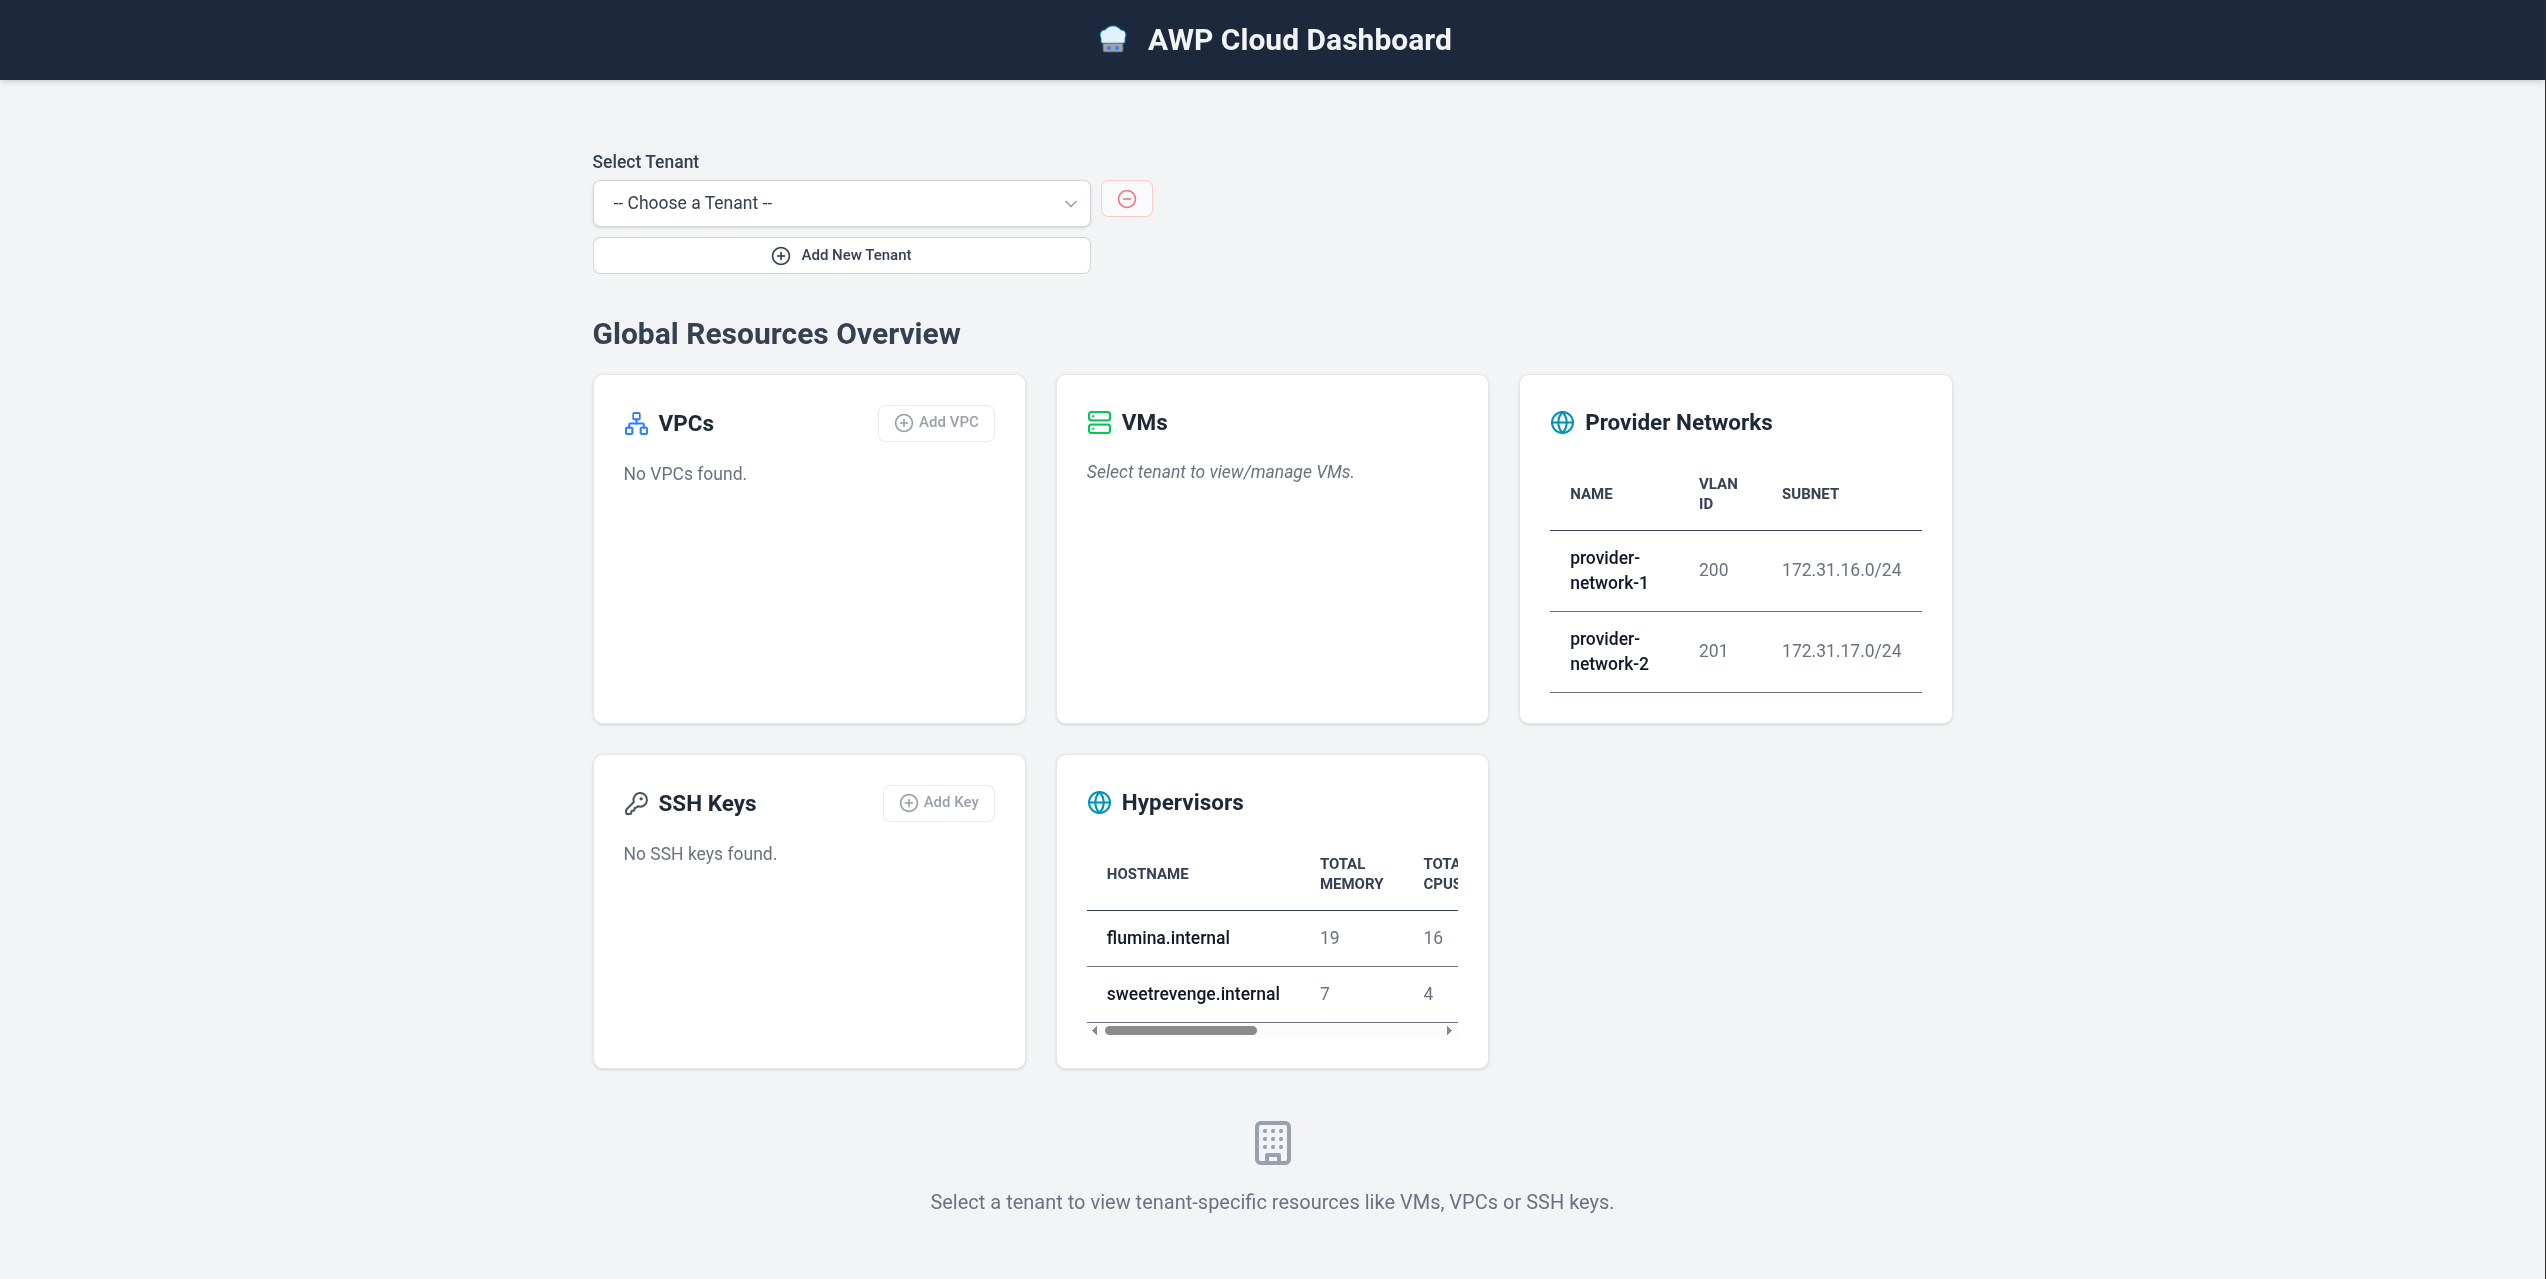
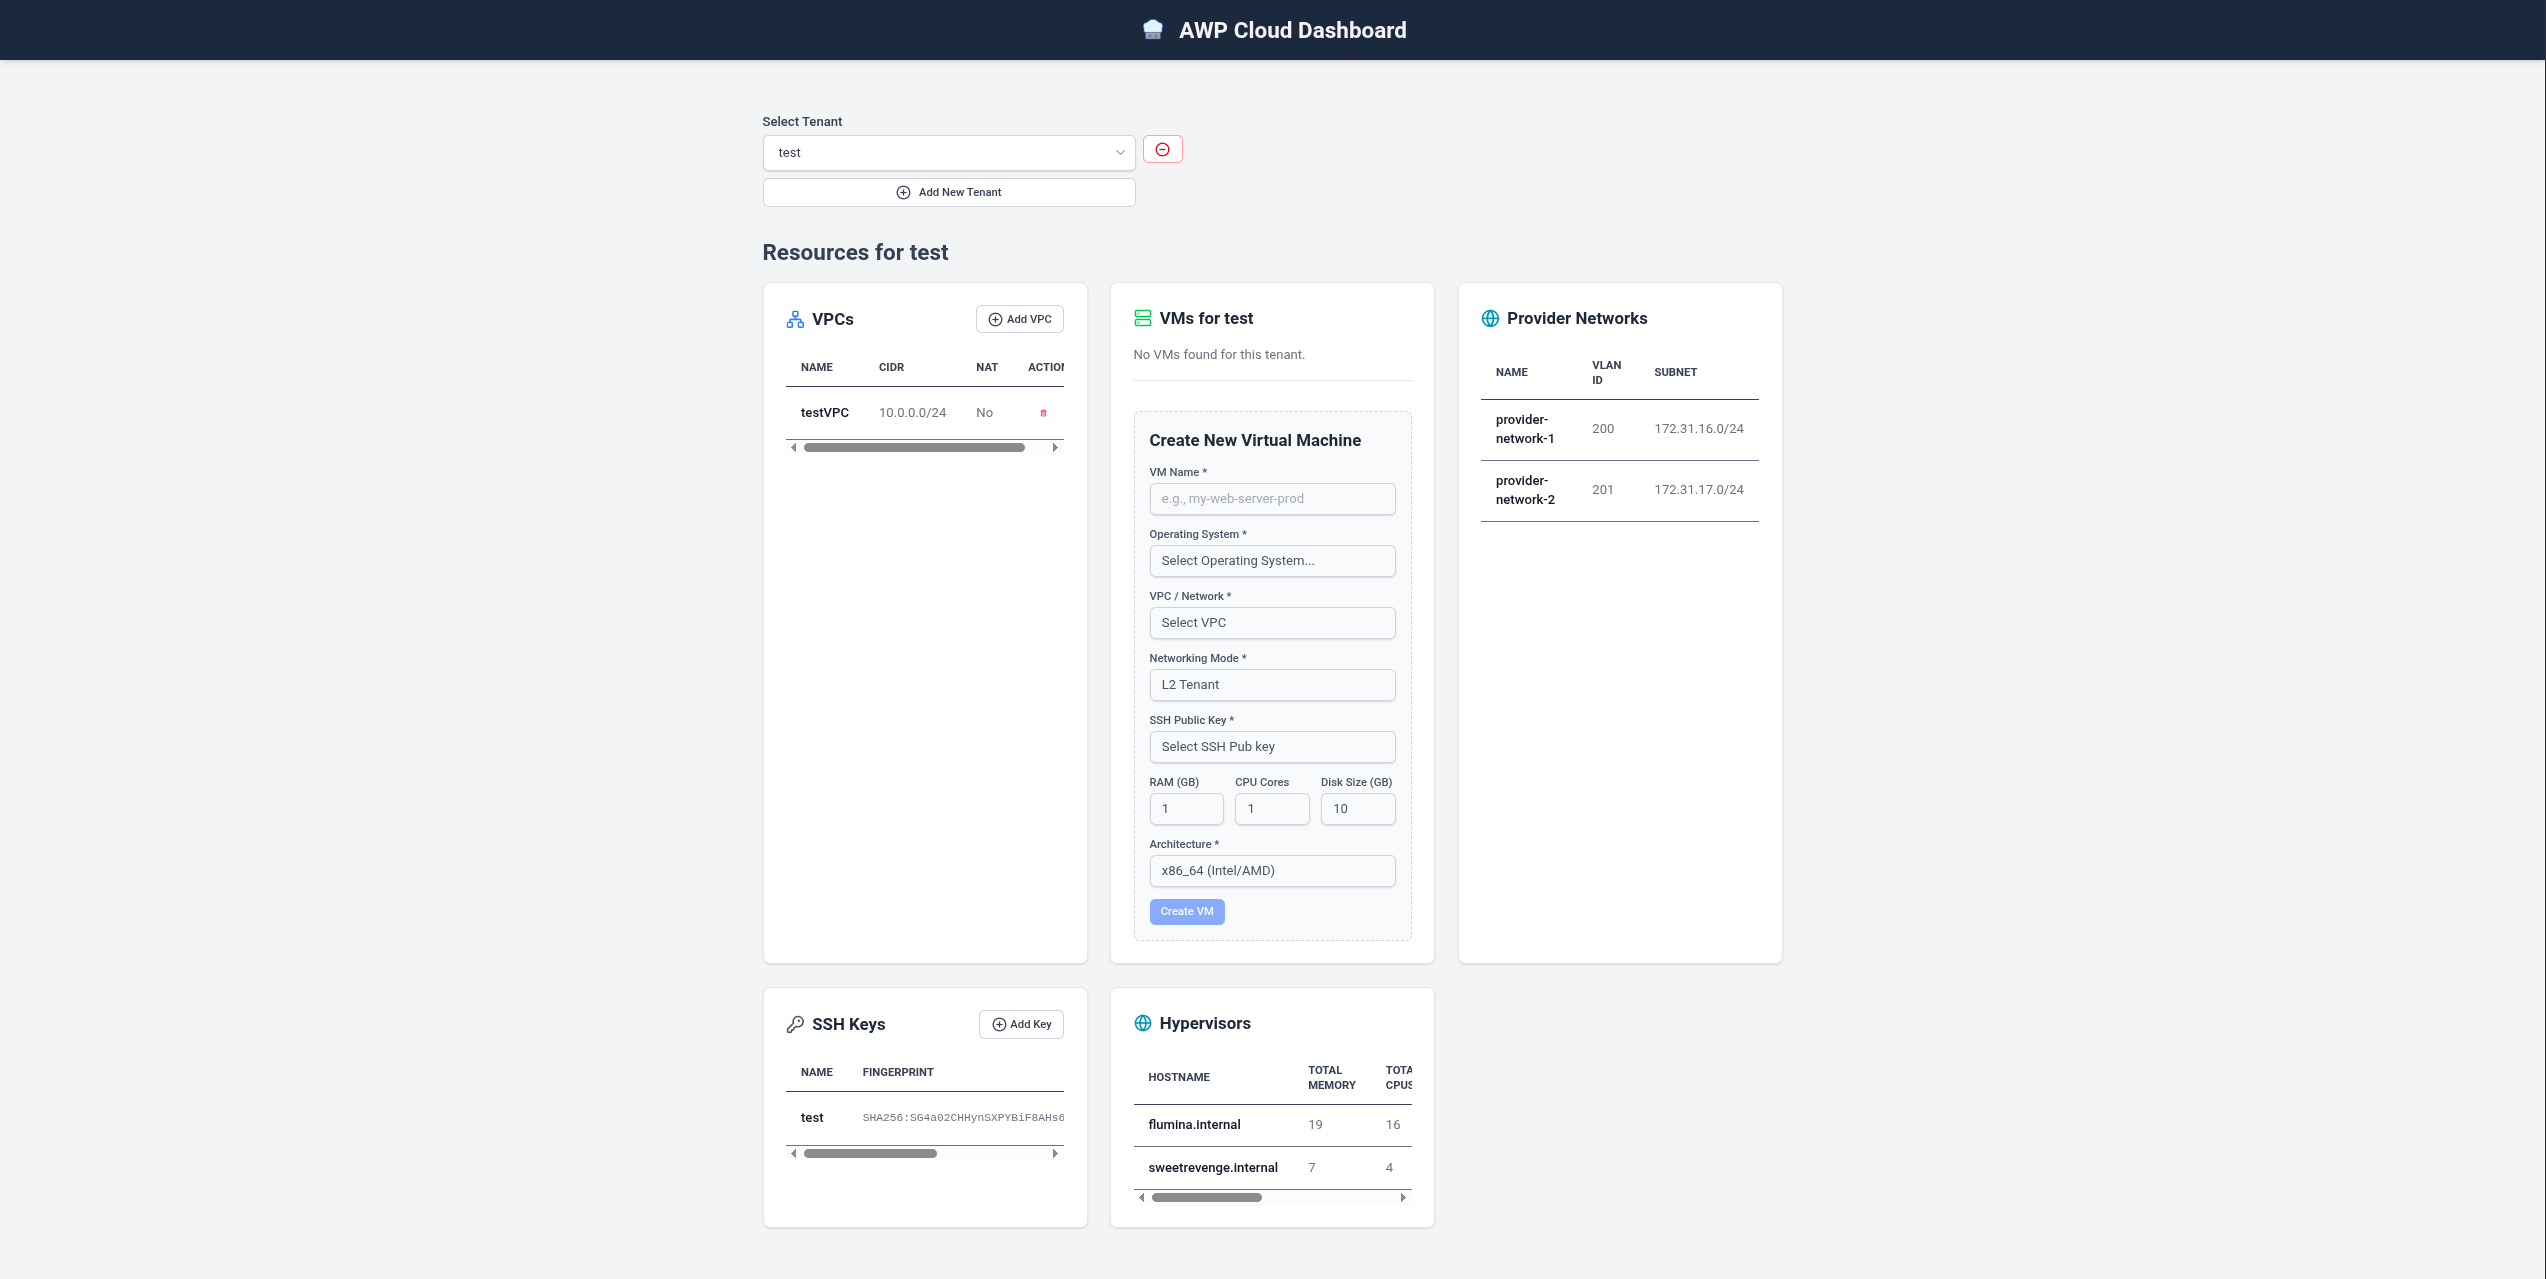
A quick peek at the web UI
What post would this be without some screenshots?!
License
I’ve chosen to release AWP under the GNU General Public License version 3 (GPLv3). I picked this license because of two main reasons:
- Keep AWP Open Source: The core principle behind GPLv3 is the so-called “copyleft.” This means if you take AWP’s code and make something new with it, you need to share your new creation under the same license and terms. This ensures that AWP and any projects based on it will always remain open-source for the whole community to benefit from. It prevents the project from being turned into a closed, proprietary product.
- Attribution: The GPLv3 requires that the original copyright notices are kept in the code. So, if someone uses or changes AWP, they must preserve the attribution (the Copyright header on each source file, that is) to the original authors and contributors. This helps recognizing the efforts of the original project author(s) who have put time, passion and dedication into code development and maintenance.
The future
While AWP began as a personal learning activity, I believe it has the potential to evolve into something more concrete. Looking ahead, I can envision several enhancements that would significantly expand its capabilities. For instance, implementing a third networking mode in order to support VMs that are configured with a flat network and want to be able to connect to the internet through NAT, this can be easily achieved by leveraging existing OVN features such as Logical Routers.
My hope, as I mentioned earlier, is that AWP won’t remain a one-man show. If you see value in AWP and are excited by the idea of shaping an open-source, easy-to-manage private cloud platform, I wholeheartedly encourage you to jump in. Whether it’s by contributing code, coming up with some initial documentation or by just sharing ideas, your involvement could be key to developing AWP further.